Twelve Kitchen Cabinets

So did you buy one, and then mimic the style?
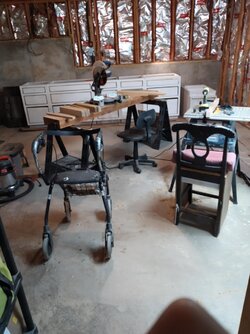
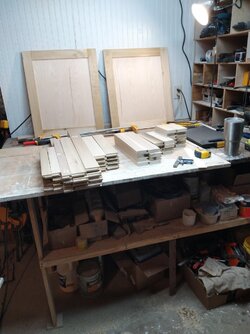
Hey Pete! No, I didn't buy one but I did mimic by using pictures. I also looked at a bunch of youtube tutorials on cabinet building and found a favorite that I used and changed up to fit my dimensions. It was incredibly helpful! Remember though regardless of quality a cabinet is just a box and the biggest difference in appearance other than size is the style of doors and drawer fronts. The style my wife chose was Shaker which I was very glad about because it's pretty simple door to build compared to raised panel doors that can get pretty intricate. This cabinet project was my wife's idea too, she had more faith in me than I had in myself (at first)!

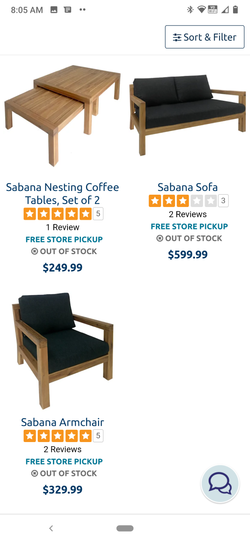
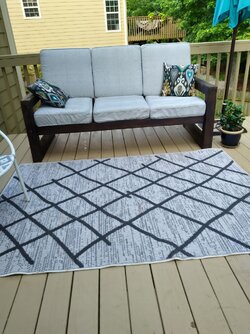
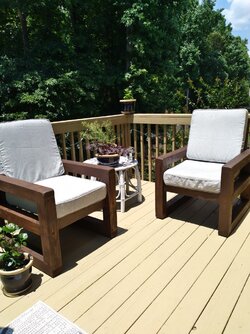
And Petey, I also used pics to mimic that fence post patio furniture but I didn't need a tutorial to build it. I simply used the cushions to get the needed dimensions. Thanks for showing interest in my project, it inspires me! Anyway, check out what I used to copycat my patio furniture.sabana.pngpatio couch.jpgpatio chairs.jpg
 
So, you're building a kitchen plus cabinets?
I sure am! I'm doing it in three phases and these first 12 boxes are part one. It's also going to be the least expensive part too. I have about 1,200 bucks invested in this first part and I will be using walnut butcher block style countertops which will probably add another 6 or 700 more bucks. Phase two will be the island with sink but first we need to remove a peninsula and part of a wall. Phase three will be the appliances, range hood and final cabinetry. Thanks for your question!
 
12 kitchen cabinets
11 new light fixtures
10 coats of primer
9 tiles of flooring
8 granite countertops
7 new dishwashers
6 farmhouse sinks
5 GOLDEN FORKS
4 cutting boards
3 french presses
2 tupperwares
And a wine rack for the wiiiiiiiiiiife
 
12 kitchen cabinets
11 new light fixtures
10 coats of primer
9 tiles of flooring
8 granite countertops
7 new dishwashers
6 farmhouse sinks
5 GOLDEN FORKS
4 cutting boards
3 french presses
2 tupperwares
And a wine rack for the wiiiiiiiiiiife
That's really clever! (and festive!) Thank you kindly!
 
  • Like
Reactions: ill
That's really clever! (and festive!) Thank you kindly!
You're welcome

I kept thinking it when I'd see the thread on the front page
 
Lot of work! Good luck. I remodeled my house 3 1/2 years ago. Damn near killed me! Finger tips were lost on 3 hands from 2 different Mexicans! Would have been a 3rd but I forbid them to continue until I found out why they kept coming out the house with fingers hanging in pieces.

It's hard to find good competent Mexicans to do construction sometimes....
 
1607194010994.png


jonah hill no GIF
 
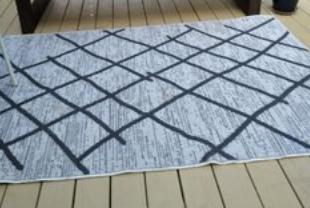
Looks like your living room carpet after you rolled over it in your wheelchair, huh?
Don't have carpet anywhere in my house and don't use a wheel chair.

But other than that your post was excellent! Keep up the good work.
 
Don't have carpet anywhere in my house and don't use a wheel chair.

But other than that your post was excellent! Keep up the good work.
Congrats on no longer using a wheelchair!
 
Congrats on no longer using a wheelchair!

It has been about 3 1/2 years now.....strong like bull now!
 
Last edited:
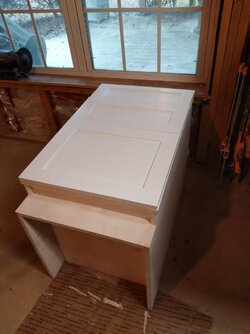
I have four more doors to hang and all of the drawer fronts still need fastened on. Hanging the doors is a breeze but I am sure that placing the drawer fronts in the correct position will be a trickier job. This is the first time for me building cabinets so I'm far from knowing all the tricks of the trade. I made some built in cabinets in the bathrooms of our first house in Akron and they looked okay but they were amateur compared to these. These are professional grade cabinets that you see being built! These wall units are 42" tall.View attachment 12833View attachment 12834View attachment 12835View attachment 12836

Are you going to put sheetrock up...or just mount them directly to the studs?

hahaha
 
So, you're building a kitchen plus cabinets?

Yeah....looks like they yanked all the sheetrock down....even the ceiling! Hahaha

Looks like more than cabinets!
 
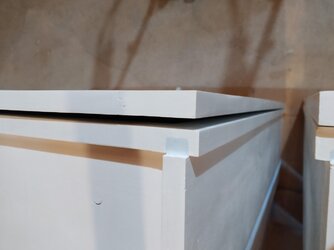
One door is warped with a gap of 3/16" at the top and flush at the bottom. But the hinges are 3-way adjustable, up and down, left and right, and in and out. So I might be able to adjust the top hinge all the way in and the bottom hinge all the way out and I'm hoping it will compensate for that gap. Each door has three hinges so I can fiddle with the middle one too, if it will help any. If that doesn't work I'm just going to have to make another door because I did some digging and there's no practical way to flatten a warped cabinet door. The experts all recommend making a new door.

not good.jpg
 
One door is warped with a gap of 3/16" at the top and flush at the bottom. But the hinges are 3-way adjustable, up and down, left and right, and in and out. So I might be able to adjust the top hinge all the way in and the bottom hinge all the way out and I'm hoping it will compensate for that gap. Each door has three hinges so I can fiddle with the middle one too, if it will help any. If that doesn't work I'm just going to have to make another door because I did some digging and there's no practical way to flatten a warped cabinet door. The experts all recommend making a new door.

View attachment 14133
You can bend it if you can get moisture in there, but painted will make it tough. It will annoy you to know end the rest of your life though, so just make a new door :suds:
 
And I decided that I would use double sided tape to hold the drawer fronts onto to the drawer boxes and add a couple of small clamps and then remove the drawer and screw through the drawer into the back of the drawer front. Each drawer front will only be about 1/32" away from the next drawer front above or below it so it would be almost impossible to use a tape measure and get everything to line up just right. I think my method will nail it! In the pic below those drawer fronts are just set there to show what it should look like.

drawer fronts ready.jpgdrawer fronts ready.jpg
 
And I decided that I would use double sided tape to hold the drawer fronts onto to the drawer boxes and add a couple of small clamps and then remove the drawer and screw through the drawer into the back of the drawer front. Each drawer front will only be about 1/32" away from the next drawer front above or below it so it would be almost impossible to use a tape measure and get everything to line up just right. I think my method will nail it! In the pic below those drawer fronts are just set there to show what it should look like.

View attachment 14134View attachment 14134
Very nice, looks great. Obviously make sure you stand the units up before trying to align them. It's a stupid comment from me, but something I would probably do once.
 
You can bend it if you can get moisture in there, but painted will make it tough. It will annoy you to know end the rest of your life though, so just make a new door :beer2:
It's less than 20 bucks in material for each door so that's minor but I spent a lot of time on each one and I painted the shit out it all careful and stuff! Now I have to get more lumber and set back up again... it just took the wind outta my sails for a minute. And I don't feel like working today, I'm resting from getting back from my vacation!
 
Top